Foam putty - application technology

Polyfoam is the most inexpensive and therefore very popular material for warming the walls of a house both inside and outside, but it needs protection from external influences - ultraviolet rays, temperature and humidity fluctuations, mechanical damage. To ensure it, a reinforcing putty for foam is used.
How to do it right, we will tell in this article.
The content of the article
What is required
Before you putty foam, it must be securely fixed to the wall.
What you will need for this and all subsequent work:
- Primer for base treatment (seeTypes of construction primers and their scope), increasing its adhesion to the adhesive;
- Glue for polystyrene - usually used ordinary tile glue;
- Umbrella dowels with a wide hat for reliable fixing of a heater;

- Plastic, metal or fiberglass mesh to reinforce the putty layer;
- Primer of deep penetration, providing reliable adhesion of the surface to the finish layer;
- Leveling putty or decorative plaster.
These are the materials. Of the tools you will need spatulas of different widths, as a rule, a drill with a mixer, rollers, brushes, a grater with sandpaper.
Particular attention should be paid to how to putty foam. To do this, use both universal compositions and special mixtures for polystyrene materials. Excellent characteristics of putties of the brand Ceresit, Ekomiks, Stolit and others.
When choosing, it is enough to carefully study the manufacturer's recommendations on the package, in which the scope is indicated.

Facades are often plastered over foam with conventional cement-sand mixtures. In this case, for reinforcement, it is necessary to choose a mesh that is resistant to alkali.
Note! If the mixture is intended for internal use, it cannot be used for the decoration of facades. And vice versa: the front putty on polystyrene should only be used externally. Also carefully look at the date of manufacture and expiration date of the material, take an interest in storage conditions.
Foam wall putty technology
After you pasted the thermal insulation on the wall and secured it with "umbrellas", the most crucial moment comes - putty and fine finish. But first, you need to glue the reinforcing mesh on the insulation, otherwise the leveling mixture will crack or begin to fall off after 2-3 years.
Mesh mounting
It is believed that the higher the density of the mesh, the stronger the plaster layer. But a very dense material is difficult to glue, so the choice of a mesh with cells about 5 mm in size will be optimal.
The technology of work is as follows:
- First, all corners, door and window slopes. To do this, cut off a strip about a meter long and 30 cm wide and bend it in half in length to form an even edge;
- Then, tiled glue or universal mixture is applied to the glued corners with a layer of 3-4 mm, a grid is applied to them and pressed, smoothing and squeezing the “herringbone” with a spatula into the solution from the corner down and to the sides;

Tip. It will be easier to work if the adhesive solution is made slightly less thick than the manufacturer recommends.
- Having dealt with the corners, they proceed to pasting the walls.Since the adhesive mortar dries quickly enough, you need to do this in small sections with an area of about one square meter, respectively cutting the mesh into pieces;
- A part of the wall is covered with the same layer of 3-4 mm and with the help of a wide spatula the mesh is pressed into the crude solution by movements from the center down and to the sides;
- It should completely "drown" in the solution, so if necessary, you can draw a little more mixture on the spatula;
- The next piece of mesh is glued with an overlap of the previous one at 10 cm;

Tip. Glue the first piece of the mesh so that the joints do not stand out so that there remains a free edge 5-10 cm wide. Apply the solution under it before gluing the next piece.
- When the mixture with the mesh pasted into it dries, the walls are rubbed with a grater to remove obvious bulges and irregularities.
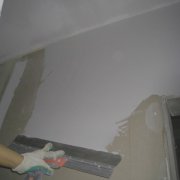
Putty application
Before you begin to level the insulated wall with putty or finish it with decorative plaster, the surface must be treated facade primer deep penetration. It will give it greater strength and provide good adhesion to the finishing layer.
Some masters miss this point, believing that the adhesion of materials is already satisfactory. Indeed, if the putty is made by the same universal mixture with which the grid was glued, and especially if the work is carried out in the interior, you can do without a primer.
But if you ask how to properly putty foam on the outer wall, the answer will be unequivocal: it is necessary to prime!
The puttying process itself is quite simple: the leveling mixture is transferred with a small spatula to a large one, 35-40 cm wide, and it is distributed over the surface in smooth movements with a layer from 3 mm to a centimeter.
Note. The density of the putty should be convenient for work. The mixture should not fall from the spatula as a whole, but should slowly drain from it.
The technology for applying the leveling layer depends on what surface you want to get:
- If for painting or wallpapering, the wall is pulled by the rule;

- If you want to create a textured surface with your own hands, then after applying putty on a small area, you need to form a decorative texture, not allowing the mixture to dry. To do this, use various devices: grater, comb, sponge with large pores, special dies and rollers.

After the leveling layer has dried, it is wiped off, as in the case of the mesh. This work should be done no later than 3-4 days after the end of the work, otherwise the putty will become too hard and it will be difficult to wipe it.
After grouting, priming and final decorative finishing are followed - painting, decorative plastering, wallpapering, etc. depending on the operating conditions of the surface and your desire.
The choice of primer also depends on the type of finish. If ordinary soil is used for wallpaper and coatings, then for decorative plaster the instruction requires the application of mixtures, which include fine-grained quartz sand. Creating a rough surface, it provides high-quality adhesion of the layers of the finish.
Conclusion
Knowing the technology for performing such work as warming the house with polystyrene foam and its subsequent puttying, you can seriously save on hired strength. If you do not understand everything and do not decide to take it on your own, watch the video in this article, in which everything is described and shown in detail.