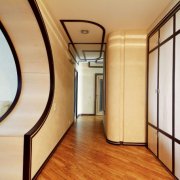
Finishing the hallway in the house: align the walls

A hallmark is a kind of visiting card of any house from the inside. Therefore, by the way the entrance hall looks, those who do not visit other rooms of the house will judge it as a whole.
To comply with all these criteria, the decoration of the hallway in a private house begins with the definition of zones. The first necessary condition is to decide what kind of light and how the hallway will be illuminated.
If there is a window, then the task is somewhat simplified.
The content of the article
Room Features
But you must remember that you will have to use the hall both late in the evening and early in the morning, and in the winter, when daylight starts at 10 and ends at 17 hours.
Therefore, it is worth considering where the backlight will be placed, and what it will be:
- upper common
- point
- wall mounted
- outdoor
- combined.
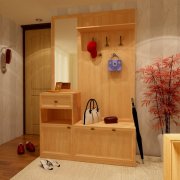
In addition to the aesthetic load, the hallway also carries the functions of a “lock compartment”. Entering the house, they remove their outer clothing and shoes.
It has an invisible border for the transition of the street zone to the home part.
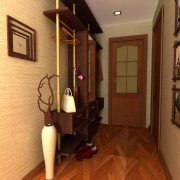
Attention! The entrance hall, which is more often devoid of daylight, that is, windows, according to the design of the house, can eventually turn into a dark, cluttered place. It is for these reasons that such close attention is paid to design and lighting.
Preparatory work
In a situation where either in order to save money, or with the desire to do everything with their own hands, neither designers nor workers are invited, you need to know what materials are used for decoration and in what sequence it is better to work.
To begin with, we determine the general concept. So that the creative creative process does not interrupt the question: “How to finish the hallway in the house?”, The accumulated experience of professionals in this matter is useful.
The front door is already installed, the window (if there is one) too, now it's up to the walls. It all starts with their alignment, and do not forget about the slopes for the door and window opening from the inside.
Tip. When embarking on plaster, do not forget to conduct electrical wiring in the corrugated tubes to the mounting points of the switches, sockets, and fixtures.
Under the passage points of corrugated tubes and sockets with switches, if they are mortise, it is necessary to make grooves and recesses of sufficient size in the walls. But do not get carried away - at first it is better to put out the beacons and see what layer of plaster will lie on top so that the recesses are not too large.
Alignment of the walls of the hallway

All the preparatory work has been completed, you can proceed to the decoration of the room, namely the alignment of walls and ceilings, which will help the instruction.
For plastering work, you will need the following tools:
- The rule is h-type or "trapezoid".
- Plaster trowel.
- Putty knife.
- Trowel for plaster.
- Ironing.
- Grout.
- Capacity for solution.
- Building level.
The latter is better to have in several versions of different lengths.
The stucco mixture is made as follows:
- 1 part of cement marking "500",
- 4 parts sifted fine (preferably dry) sand,
- 1 part slaked lime.
All this is sold in the construction markets, as well as ready-made plaster mixes, however. Water must be added in parts so that a homogeneous, putty mass is obtained in the end.
The technique of applying plaster is as follows.Focusing on the exposed beacons (these can be screws screwed to such a depth that they make even verticals, horizontals and diagonals) or narrow aluminum profiles screwed on the same principle - the trowel throws the solution from bottom to top along the strip of beacons.
Then the leveling solution is leveled, the excess is removed as a rule. All in the direction from the bottom up.
It is checked by the level of vertical, horizontal and diagonal. With good grouting performance, the surface is brought to perfect evenness without tubercles and depressions, see the video instruction.
Tip. Given that lime is present in the solution, hands and eyes should be protected. In front of his eyes are special glasses, on his hands are mounting gloves with a rubberized carpal section.
Drywall the walls

You can evenify the walls with drywall. This process is technically more complicated and more expensive.
However, it has a definite advantage:
- possibly modeling by zones,
- conducting electric cable and other communications between the wall and the sheet more freely,
- Mortise sockets, switches, lamps are easily mounted.
For reference. But it is less durable than plaster on the wall, and therefore can not bear a heavy load. You will not hang a large clothes hanger on it. In addition, a certain area of the hallway will cease to be "useful."
Having finished the finishing work on the walls, having already decided on the decoration of the walls and ceiling, we proceed to the top. If the ceiling is whitened, glued with wallpaper, painted or the ceiling tile is glued to it, it will be necessary to repair all the seams and smooth the protrusions, if any.
To do this, you can use the same plaster solution, only in a thicker form. Gently, using a narrow (6-8 cm) metal spatula, apply the solution in small amounts to the defects.
Features of the entrance hall in a wooden house

Often you can find houses built of wood. It is beautiful, environmentally friendly and durable.
Wood is a material that can last for decades with proper installation and operation. The complexity is caused by cosmetic design, since almost all finishing techniques for stone rooms, for a wooden house are not suitable.
Finishing the hallway in a wooden house comes down to the same zoning that is produced by the same tree, see Electrical wiring and communications are hidden between the bars, under the floor or over the ceiling.
Naturally, sockets and switches use mainly overhead.
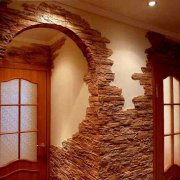
Although the tree does not provide a wide scope for the implementation of many decisions inherent in a stone house, but with sufficient imagination, you can turn the "visit card" of a wooden house into something fabulous, unique. Leaving from hi-tech, cold and gloomy, generally accepted traditions of the halls, you can create a unique interior of warmth and coziness.
Undoubtedly, the length of the work on decorating the entrance hall with your own hands will be much longer than with the work of a team of professionals. Something will have to be redone, something will not work at all.
But, despite this, the final result will please the household, and the price of finishing work will decrease significantly. Any material is suitable for aligned walls and ceiling, everything here depends on personal preferences.
Aligned walls and ceiling in-house will help to significantly save not only money, but also usable area.