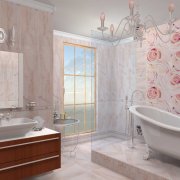
Plasterboard bathroom decoration: work procedure

Increasingly, such materials as drywall and a bathroom are used in construction, no exception. It is very convenient to use and does not require much effort during installation, so the plasterboard finish of the bathroom is quick and reliable.
True, they use a special moisture-resistant GLA for such purposes. Fasteners are made with self-tapping screws, or driven dowels, it all depends on the thickness and strength of the wall itself.
The content of the article
Work sequence: installation of profiles, instruction
Before fixing the base material, it is necessary to install a profile. The crate is found from metal profiles, many prefer to use a wooden structure in order to save, although for the bathroom this is not the best option.
The metal frame will be much stronger and will last longer. If the walls in the bathroom are concrete or brick, then installation is best done with dowels.
The plasterboard bathtub is finished using the following tool:
- screwdriver
- metal scissors
- level
- roulette wheel
- plane
- hammer
- square
- hammer drill
- chalk or pencil
- knife (for cutting drywall)
- tracer.
Having at hand the necessary tools and some construction skills, installation can be done with your own hands. The main thing is to first familiarize yourself with the rules and instructions for this work.
Installation safety also plays a special role.

Installation procedure for drywall in the bathroom
When working with moisture-proof drywall, you must adhere to some features. First of all, you should prepare the surface of the walls in the bathroom before starting work.
If there is such a need, upholstery and cleaning of the plaster, close up large cracks.
Attention! It is recommended to immediately mark and wiring for switches and sockets and replace the plumbing (if necessary).
So:
- Wall marking is made for profiles, this is if you need to take marks in the plan for fastening profiles that will go around the perimeter. It uses coarse screws or dowels nails.
- Carry out the marking of the suspension and rack profiles. Make markings in the place where the shelves should be. Fasten rack profiles to guide profiles.
Now you can proceed to wall cladding with a material that is attached to the profiles using self-tapping screws. - This work is preferably done with an assistant. Drywall is primed and putty, that is, prepared for its further decoration.
The final stage is the finishing of the seams and the closing of the indentation from self-tapping screws.
Tip. Close them up with putty. For an ideal surface, apply it in several layers, smoothing out all the bumps.
How to make the installation of the supporting structure, given the shelves and niches
Plasterboard bathroom decoration begins with marking. First of all, marking is applied to the floor, using a painting cord.
All lines should be clear and precise, since they will need to be mounted guide profiles. The same line is drawn on the ceiling.
Attention! To properly carry out the procedure, it is advisable to use a suspension. Here you can’t do without a partner, since one must hold the guide profiles strictly along the specified line, and the second should drill holes for the dowels.

So:
- The distance between the dowels must be left at least 60 centimeters. To make the construction reliable and durable, apply from 3 or more nails somewhere on one profile.
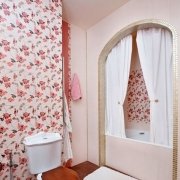
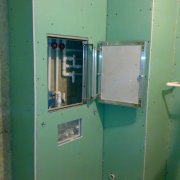
- Built-in niches are very relevant in bathrooms. They significantly save space and make the room modern, comfortable and spacious.
Decorative drywall shelves in the wall are also relevant. They use such niches not only for storing things, but also in order to hide sewer pipes and communications from their eyes. - Before making such a shelf, you should first draw up a plan and draw a drawing of the shelf with its future shapes and sizes. Regardless of size, the shelf is mounted on profiles.
They create the perimeter of the shelf itself, which facilitates subsequent work, then drill holes under the dowels in the niche. - After all of the above work, they begin to markup under the vertical profiles of the PP. Measure and mark the exact location of the fasteners.
The distance between these profiles is determined using the most moisture-resistant drywall. The width of the sheet is this distance.
Having installed all the necessary profiles, make holes on the material for screws or dowels. Fix the straight holes and mount the frame partition where the built-in cabinet will be located.
The distance from the main wall to the depth of the shelf should be the same. Partitions are made from PNP profiles.
The base wall with the frame is fixed with special jumpers.
Plasterboard installation and installation of parking profiles
After installing the built-in niches and shelves, installation of parking and vertical profiles is started. They are cut in advance in length, which is equal to the height of the room.
Using a level, mark the lines where the vertical profile will be located. The lines drill holes for dowels for mounting suspensions.
So:
- Similarly prepare and parking profiles in the locations of shelves and niches. They start working with them after installing the suspensions.
The parking profile must be mounted in the guide profiles from the bottom and top. Fix it with suspensions, given the layout of the future cabinet.
Profiles and suspensions are fixed among themselves by construction crabs. Now the supporting structure is ready.
Now it is possible to attach to this design the material itself - drywall.
Attention! During operation, you must be careful about electrical wiring and communications. Install them even before covering the room, otherwise all the wires and pipes will be on the surface, which will ruin the look of the bathroom.
In advance, you can provide lighting in each niche.
If insulation is needed, then before finishing, the room is insulated, and then proceed to sheathing all the shelves, walls and cabinets.

- Drying the bathroom with drywall should be done carefully and carefully, since in such rooms special attention should be paid to the installation of the material in the corners. This is especially true for small rooms.
To avoid such difficulties, you need vertical racks with overlapping sheets, made so that one sheet of material is firmly pressed against another. This approach will facilitate the process of work itself and make the corners neat. - It is known that a moisture-resistant material protects against moisture, but for the full effect you should leave a small space between the floor and the sheet. Otherwise, there will be dampness in the room, and a fungus will form under the drywall.
To save a small space, small wooden linings are adjusted under the material. They are prepared in advance.
It should be noted that all sheets of this building material are attached to the supporting structure with self-tapping screws.The surface of the sheet is primed, all the joints are sealed with putty.
Close up the recesses from dowels and screws. Each shelf is painted and faced with finishing material.
How to finish drywall without a metal frame
To finish the bathroom with moisture-proof drywall, it is not necessary to use a metal frame. In some cases, you can do without it.
This is if the room is too small and the walls are not made of concrete or brick. So, you need to withstand some conditions.
For example, the surface of the walls should be flat: without cracks, bumps.
Before finishing, all walls should be treated with reliable moisture protection and allowed to dry.. The plane must not freeze.
Therefore, if possible, it is necessary to insulate the room. After that, just proceed with the installation.
It is needed during operation:
- putty knife,
- mixture for installation,
- moisture resistant drywall.
Glue is applied uniformly over the entire surface of the wall. Be sure to leave a gap between the floor and the material.
For him, small linings are used, which are removed after the glue has seized. Think in advance of niches and shelves in the room, as well as niches to hide pipes and communications in the room.
Do not forget about ventilation either.
If you doubt that you can handle it yourself, you can turn to specialists for help, or watch a special video that will help you figure out the issues that interest you.
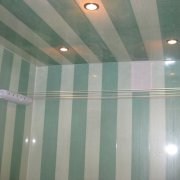
How to make a suspended ceiling out of moisture-proof drywall

The suspended ceiling looks very impressive in the bathroom.
To install a suspended ceiling made of moisture-proof drywall in the bathroom, you need to stock up on some tools, such as:
- level
- tape measure
- drill
- screwdriver
- crown to make large diameter holes
- sand paper
- spatula
- construction knife
- a planer.
Should stock up yet:
- guide profile
- ceiling profile
- direct suspension
- moisture resistant GCR,
- crabs
- screws
- dowels.
Tip. On how to properly perform the suspended ceiling, you can watch the video and follow the instructions, repeating such actions.
Getting started:
- So as for the ceiling. First you need to decide on the level at which the ceiling will be.
If spot lighting is provided, then it should be about 10 centimeters. This is necessary so that the lamps do not overheat, and there is room for a lamp base. - The construction level will help to accurately indicate the required distance and allow you to place reference points. Having marked the zero level, proceed to fasten the guide profile.
Fasten it with dowels, which are fixed from each other at a distance of 50 centimeters. Then mount the ceiling profile.

- Before installing it, serifs are made at a distance of 60 centimeters from each other. Direct suspensions are used to fasten the ceiling profile, fixing them at a distance of 40 centimeters.
When fixing a profile, it is always worth using a level to prevent errors in size and not to make the ceiling uneven. - For structural strength, transverse jumpers are used. Before installation, the sheets are cut, after measuring them.
The ceilings in the bathroom are not always large, so the sheet size will also be small. Mount sheets on self-tapping screws, as in other rooms. - With the help of crowns, a place is drilled under the lamps. The joints and the pit where there are screws or screws are puttied.
Now you can proceed to the decorative decoration of the ceiling. In the bathroom, the ceilings are mainly painted with moisture-resistant material, in any case, the room is transformed.
As you can see, working with drywall in the bathroom is not difficult.Here you only need to follow certain instructions, choose the right material and consider all the little things and details in the room.
The price of such work will not be great if you do the installation yourself.

Especially successfully you can hide the sewer and water pipes, since they usually pass in niches. Here you can even do without a metal frame, the sheets are perfectly screwed to the dowels, driven into the front of the wall. And if you attach small pens to the sheets, then you can make the drywall sheets removable to control the condition of the pipes.