Putty finishing - what is it

For filling cracks in certain sections of the walls, putty is used. But in order to prepare the surface for finishing, a putty is used.
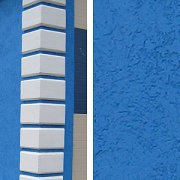
This coating allows you to get the most smooth surface. With its help, defects remaining after the starting putty layer are eliminated, surface strength is increased, adhesion between materials and sound insulation of the wall are improved.
The content of the article
Material requirements

Putty finish is a composition that helps to ennoble the room, give the walls a uniform, holistic and very even structure. To improve the quality of finishing work, the coating is best applied using special technology. What is a finishing putty and what is its difference from plaster?
This is a material that:
- Has granules with a fine fraction.
- Snow-white color.
- May be with gloss elements.
- It has good adhesion, which allows the putty not to peel off the wall and stay on its surface for a long time.
Finished finishing putty must meet the following requirements:
- It is easy to lie down on the walls, do not reach for the tool.
- Do not drain off the surface during work.
- Even a thin coating should hide surface defects.
- Do not crack after hardening.
- The color of the coating should be even, clean without any pigments, and the finished mass should have a uniform consistency, as in the photo.

Types of finishing putty
Before you putty finish putty, you need to get acquainted with its types.
The main types of material and their features are presented in the table:
| Benefits | disadvantages |
 Cement putty It is used for wall decoration in rooms where there is high humidity: bathrooms (seeWall decoration in the bathroom: types of material), bathrooms, kitchens. | |
|
|
 Plaster putty | |
|
|
 Polymer putty There are two types: acrylic and polymer. | |
Acrylic Putty:
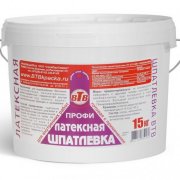
Latex formulations:
|
|
Putty mixture options
The most popular manufacturers of finishing putty today are:
- Vetonit BX.

The composition is based on cement. It is used for leveling concrete and new plastered surfaces in dry and wet rooms.
- Shitrok.

The composition of the material includes vinyl fibers. They increase the strength of the material and allow for external wall decoration and work in damp rooms. Despite the rather high consumption of finishing putty per 1 m2, when working with it, you won’t need to puzzle over the correct preparation of the solution, which and in what quantity of ingredients you need to add. The mixture is purchased ready-made, and after opening the package, it can be immediately applied to the surface.
Used for finishing concrete, masonry, applied to plaster. It can be applied by airless spraying. Best used for finishing drywall sheets (seeHow to putty drywall - basic rules and techniques).
- Maxi.

This is a fine-grained, odorless, water-soluble topcoat, dries quickly enough, and is used for internal work. Perfectly fills seams, all kinds of cracks and bumps. It is used in rooms with normal humidity.
- Multi-finish.

Putty multi-finish is a dry mixture of gypsum based on very fine grinding with the addition of polymer modifiers that make the composition good plasticity. This is a premium product. It is used for finishing any surfaces.
Which finishing putty to choose for surface finishes, everyone chooses for himself. In addition to its quality, the finishing putty is also taken into account.
Putty application
Before starting work, first of all, the finishing putty should be chosen correctly.
Its consumption per 1 m² can be preliminarily calculated using the table data:
| Type of material | Putty consumption per m², kg |
| Vetonite | 1.25 kg / m² |
| Sitrock | 0.5 kg / m² |
| Multi-finish | Up to 1 kg / m² |
| Ceresit | Up to 1.1 kg / m² |
| Gypsum | Up to 0.6 kg / m² |
| Universal | 0.5 kg / m² |
These are only indicative indicators; a more accurate amount of putty depends on the type of surface and the degree of its deformation.
The work instruction offers:
- Apply a thin layer, up to three millimeters, on the polished surface after starting putty.
- The final coating on the surface is applied no earlier than a day after laying the previous layer.
- For work, large spatulas are used, and for inaccessible places, small spatulas.
- Subsequent layers of putty are applied with a change in the direction of application of the solution by the previous layer.
- After the layer dries, the surface is treated with a sandpaper to remove even small defects.
How to putty putty, which can be better learned from the video in this article.
A few recommendations when working with finishing putty:
- When preparing the composition from a dry mixture, it is necessary to protect the respiratory organs with a respirator.
- Putty is best applied on a large spatula with a thin layer.
- The remaining solution must not be poured into the sewer to prevent clogging.
- After completion of work, all tools must be washed with warm water.
- The puttied surface should be protected from moisture for at least three days.
Putty Tools
For the correct finishing putty, it is necessary to prepare a certain set of tools.
These include:
- Drill with a specialized nozzle, you can use an industrial mixer.Such a device will be needed for high-quality mixing of the dry mixture when diluted with water.
- Puttying on the walls is carried out with a spatula. It is better to purchase a kit that consists of tools of different sizes.
- Rollers and brushes for priming.

- Building level to control the evenness of the wall.

- Fine sandpaper for cleaning irregularities on the hardened mixture.
- Manual skater for stripping a large area.

- Capacity for dilution and mixing putty.
Tip: When planning a large volume of work, do not mix a lot of solution at once. In this case, it is considered which finishing putty is selected, the consumption per 1 m². The composition dries in a few hours, and if it is not used, the mixture will be in a container.
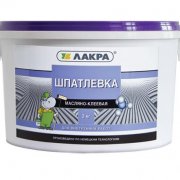
Finishing putty can be purchased in banks, in finished form, but its cost is 20% more than the dry mix, which you can dilute yourself as needed.
For this:
- Cold water is poured into a round plastic container of the right size.
- It is poured in compliance with certain proportions, the right amount of dry mix.
Tip: Do not use metal containers. When mixing, the mixer blades will hit the walls of the container, rust will appear on the metal, which can get into the putty.

- The solution is thoroughly mixed until the lumps disappear.
- Putty should take the form of a homogeneous pasty mass.
- Due to the different dissolution rates of the various components in the dry mixture, mixing should be repeated after five minutes.
- Ready putty should be obtained by the consistency of thick sour cream. When removing the mixer from the putty, a non-disappearing trace remains on its surface.

- When applying putty with a thin layer, it should be more rare, and thick - thick.
- After mixing, the tool should be washed immediately, lowering it into water so that it works a little.
Technology for applying putty
How to putty putty.
The work instruction offers:
- Wipe the surface of the wall with a cloth dampened with plenty of water. Especially when applying a very thin layer of material. In this case:
- dust and dirt are removed from the treated surface of the wall;
- its surface is moistened, which allows to slow the setting of the composition and improve adhesion.

- The surface of the walls is primed.
- After drying the surface with a narrow spatula, a small amount of putty is accumulated.

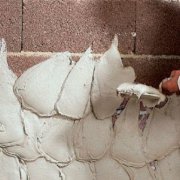
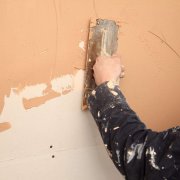
- The mixture is evenly applied to the surface by moving the tool crosswise in a vertical direction.
- A wide spatula is wiped with a damp cloth, without pressure is applied to the beginning of the plot with putty at a slight angle to the surface and with a very small pressure is stretched along the wall until a smooth surface is obtained.

- After the putty has dried, the walls are sanded with sandpaper or fine mesh.
The article briefly describes what the finishing putty is for. Only a perfectly even surface of walls or ceilings will allow you to apply any quality finishing material.