Floor filling
When the filling of the floor screed in the apartment is completed, they proceed to the finish - applying a decorative coating. In Russia, decorative flooring instead of laying traditional flooring is rapidly gaining popularity. After all, the bulk floor after pouring not only pleases the eye of the owners, but also recalls how much time and effort it was possible to save when arranging the floor covering.

The development of the technology of bulk floors is provoked by the obsolescence of previous finishing techniques. In addition, filling the floor in the apartment is an alternative for those who can not afford parquet or even laminate, and linoleum does not cause sympathy. Or maybe it’s not the costs and tastes of the owners, it’s just that none of these floor coverings provides such uniformity, solidity and tightness, appreciated by the owners, while the screed was cast. In any case, whichever of these factors is decisive, it is obvious that they are quite enough. We will send strength, lack of seams and ease of self-assembly to the same piggy bank.
Filling of a bulk floor has specificity in comparison with similar procedures on a rough coating. Therefore, we will analyze in detail what kind of mixture is used for filling the floor, why pouring the floor with a self-leveling mixture is preferable, and why filling the floor screed is an experience that is useful when applying a facial coating.
The content of the article
Where to begin?
To begin, as always in repair work, will have to assess the functional features of the room. You have to choose which floor fill with a finishing layer - mineral or polymer - meets the requirements of the current repair. This decision will be affected: whether the irregularities have been qualitatively corrected by pouring the floor with concrete, the presence or absence of a decorative coating, humidity in the room, and the presence of heating (pouring a warm floor has features).
Mineral Compounds
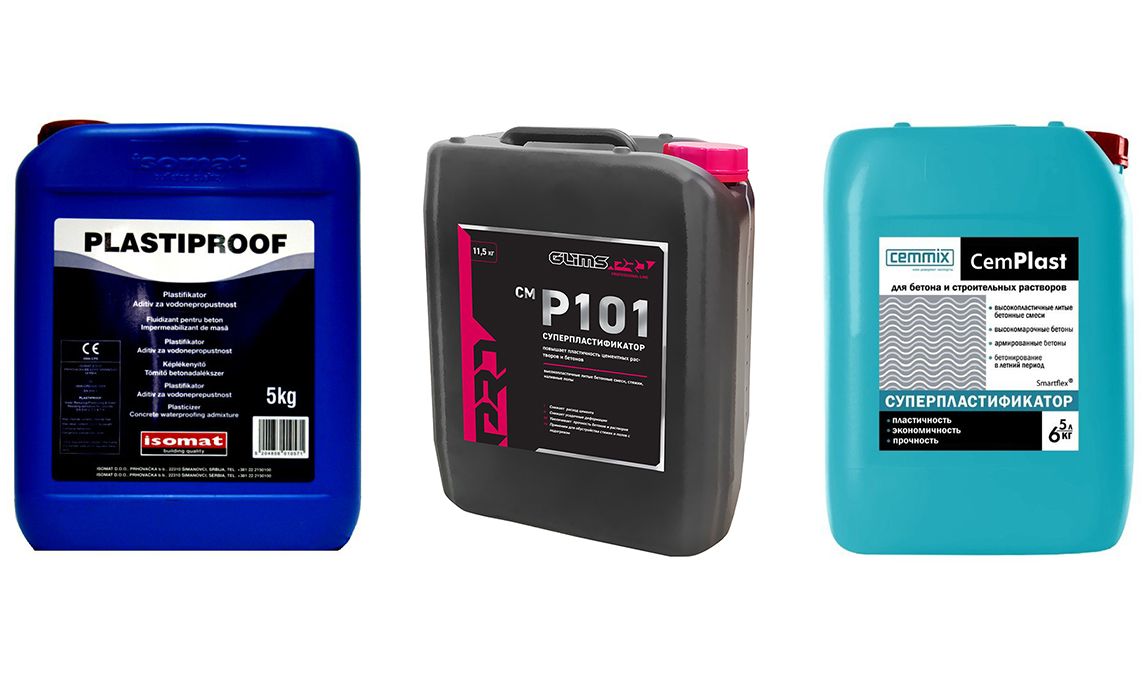
They are prepared on the basis of cement with the addition of modifying substances, for example, plasticizers. Mineral composition can fill a smooth and durable surface - both rough and finish.
The mixture for the subfloor is intended to eliminate defects in the previous layer of screed by applying the composition to a height of up to 0.2 m. Finishing with mineral fill is a commonly used basis for laying decorative flooring - parquet, linoleum, tile or laminate. A rarer case, when this is the last decorative layer painted with paint.
There are two arguments in favor of choosing the mineral composition for arranging the bulk floor.
Firstly, ease of installation, including the ability to quickly correct the mistake made - by applying an additional layer, for example. It is of paramount importance to the owners doing the pouring themselves.
Secondly, reasonable price of the necessary materials, which helps to save on the arrangement of the floor structure.
Polymers
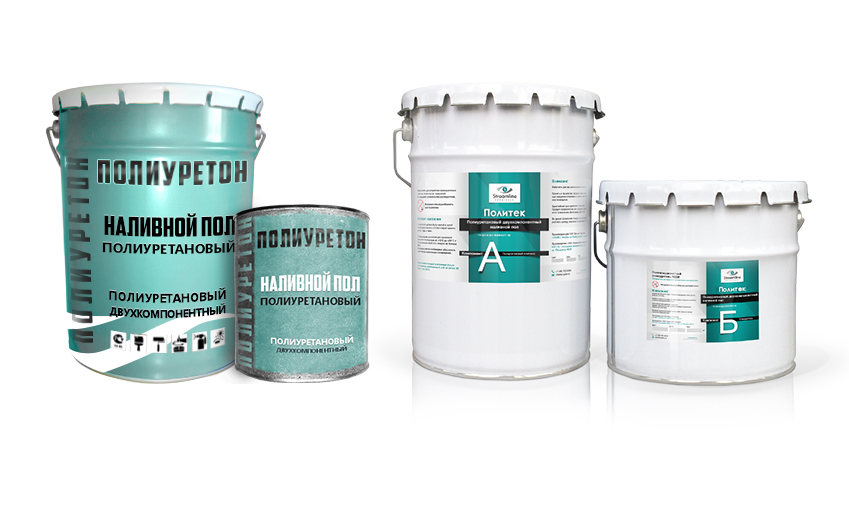
As mentioned above, a bulk floor made of mineral composition is still a rare case. In the classical sense, this term refers to a final polymer coating. The basis for the polymer layer is a sand-cement screed, a base made of concrete or wood, and sometimes ceramic tiles.Bulk floors are classified by a key component into cement-acrylic, polyurethane; epoxy; epoxy urethane; methyl methacrylate. The latter type is the most high-tech and requires application experience. Let us dwell on those that are easier to handle.
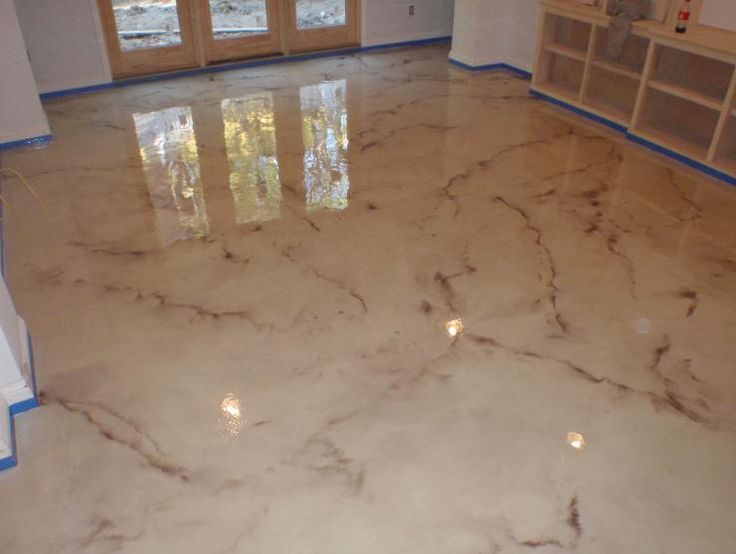
To create a bulk floor in residential premises, an epoxy mixture is often used, although it is used in commercial ones. The long life of such a flooring is guaranteed. In this case, you can decorate it simply by adding a dye, or by applying a pattern (subject to the transparency of the base).
Polyurethane self-leveling floor - the leader in sales for domestic use. The resulting seamless monolith does not react with chemicals, does not crack under loads, and has good thermal insulation properties. In addition, it provides space for the flight of imagination of designers or hosts - they have at their disposal a wide range of colors and natural shine of material.
Work on creating a mineral bulk floor
If mineral composition is chosen for filling the floor in the apartment, carefully read the instructions on the packaging of the components and prepare the set of tools that will be required. This is, first of all, a container for diluting the solution, a device for stirring (if there is no construction mixer, a drill with a special nozzle is also suitable), beacons, several spatulas of different widths to choose from and a gear roller. In some cases, there is a need for a grinder, it is advisable to keep a set of tools at hand. If you have to be distracted and lose time searching, you can disrupt the fill technology without completing work on the layer on time.
Foundation laying
To properly lay the base, the rough surface is pre-cleaned of dust and litter and checked for cracks. In case of detection, defects are eliminated by carefully coating each damaged area. In the works there is a pause for drying the applied composition.

As soon as the surface dries, proceed to the next step - stick the damper tape around the perimeter of the room. Prime the original surface in two layers and measure the level at which you need to pour the mineral composition. If significant differences are found, then the completed screed does not bring the desired result, an additional layer of screed will help to fix the situation. After leveling the rough floor, do not start pouring the floor until the bottom layer dries to the end.
Making a mixture
The correct consistency of the grout is achieved by observing the proportions of the dry mix and water recommended by the manufacturer. If you add less water, the solution will not spread properly over the surface, and if more, the strength of the final coating decreases, which threatens to form cracks.
Therefore, pour as much water as indicated on the packaging into a pre-prepared clean container and pour the mixture gently and slowly. Mix the mortar with a construction mixer or drill with a nozzle for 8-12 minutes, until a homogeneous solution is obtained without lumps and splashes.
If there is no experience in the preparation of such mixtures, and in appearance it is difficult to determine whether it turned out correctly, check the solution for flowability. A plastic cap from any cosmetic or medicinal product will help in this, if its diameter is about 50 mm. The bottom of the cap will not be useful to us, cut off and discard this part. There remains a plastic ring, which is installed on a flat surface and the resulting mixture is poured there. The ring rises during the spreading process, and the solution is distributed over the surface.
The desired result is obtained if the diameter of the spreading solution is about 17 cm. Another diameter indicates an error when mixing. If less, add water to the solution.If more - add dry mixture. After making sure that the consistency is correct, start pouring the floor immediately, since you can not store the finished mixture for a long time.
The climate is also affected by the indoor microclimate. Strength and smoothness of the surface of the self-leveling floor can be achieved at a temperature of 15 to 25 degrees Celsius and humidity up to 80%, so that condensation does not settle on the coating.
Weight distribution on the floor surface
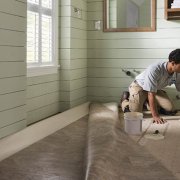
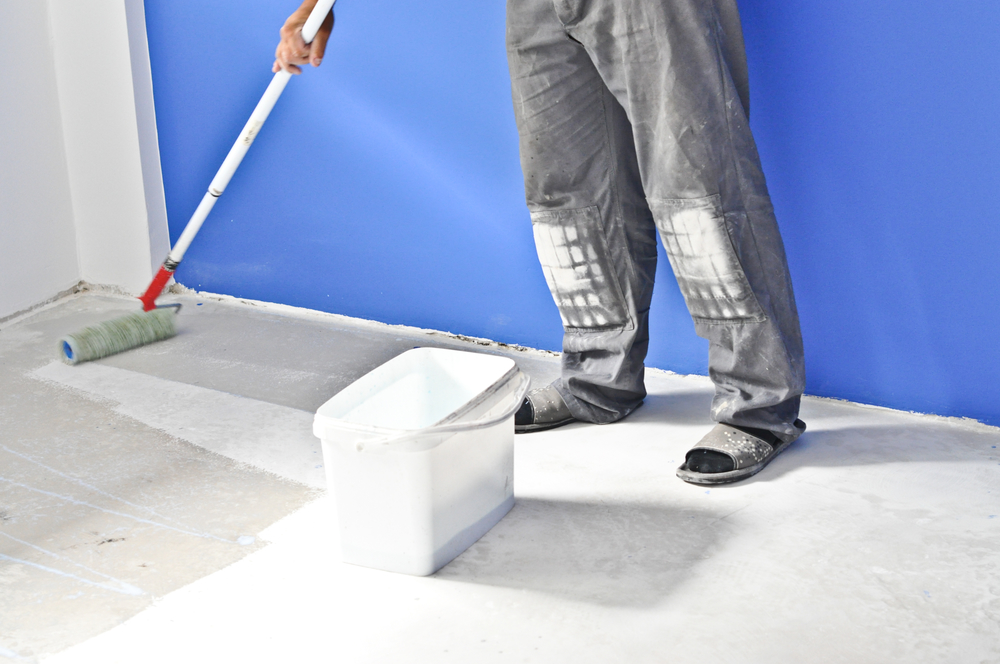
Filling the floor with your own hands is not the most difficult operation, after preparing the base, it remains to once again check how smooth the surface has turned out, if necessary, eliminate the imperfections again, install the beacons and fill the solution. Spread the mixture with a spatula or squeegee.
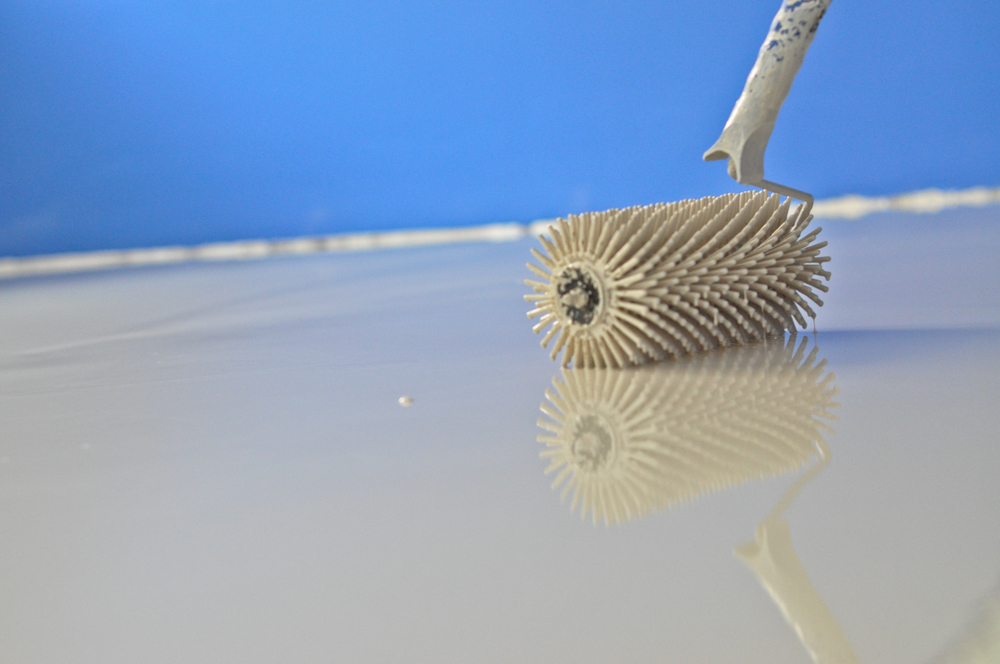
Then comes the turn of the needle roller, expelling air bubbles from the flooded layer. If this procedure is neglected, the risk of cracking is high. Carefully walked along the surface with a roller with needles - and that's it, remove the beacons. The process of filling the floor in the apartment is completed, we are waiting for drying.
Polymer coating - work steps
The stages of polymer pouring are similar to mineral pouring: preparation of the base, direct pouring and surface distribution. The recommended polymer coating thickness for domestic premises - from 1.5 to 2 mm, adds specificity to the process. If you pour the solution to a height of 1 mm, the floor structure will lose in practicality. If you bring the thickness of the layer to 4, 5, or even 8 mm approved by the manufacturer, the savings on flooring will come to naught.
The same set of tools described in the previous sections will be required in this case. This is a container for preparing a solution for filling the floor, and preferably 2 or 3, so as not to be distracted in the process. As well as a drill with a nozzle or a construction mixer, a needle roller, a doctor blade and a putty knife.
Base work
How long the entire structure will last will depend on the quality of preparation of the foundation, so we take work on it seriously. Before arranging the bulk floor, we check how smooth the surface of the base is and whether there are large differences in height. A two-meter rail-level will help determine the horizontal level in each direction, the maximum permissible deviation is 4 mm.
Substrate preparation before filling the floor depends on the material of the subfloor. If it is a tree, the permissible humidity is not more than 10 percent. After checking whether the humidity corresponds to the specified level, we proceed to dismantle the excess: we get rid of old skirtings, paint, varnish and glue from the entire surface. Manually this is done with a spatula, scraper and a metal brush, but it is easier to mechanize the process and use a grinder.
The next stage of preparation of the base is the opening of cracks and cleaning the surface with sandpaper. We collect the dust generated during cleaning with an industrial vacuum cleaner. To degrease a dust-free floor, use a special cleaner. Inspect the old wood floor for fungus and mold that will destroy the base if you do not get rid of them at this stage.
After coating the cracks, we evaluate the resulting surface and decide whether we can do without mounting the screed. If in doubt - the screed is still preferable to fill, so more reliable.
The preparation process will be much easier if the original surface is represented by ceramic tiles. It is enough to check whether the elements are firmly held, remove those that are loosely fixed, and putty the places where the tiles were removed. Now all that remains is to degrease the tiled floor with an organic solvent and prime the surface.
A primer layer enhances adhesion between the base and the existing floor, so do not neglect this step. Spread the solution on a primed subfloor will also be better.If the surface is porous, apply special primers with high viscosity in several layers.
Concrete base
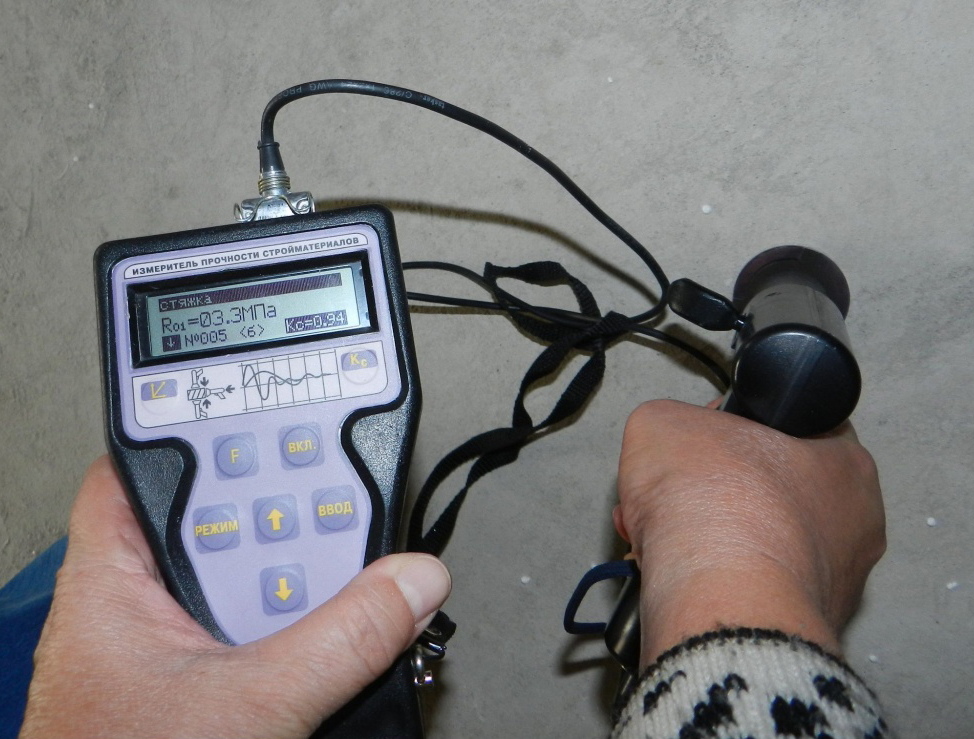
For a concrete base, separate rules for preparing for finishing pouring the floor apply. The maximum permissible humidity is 4%. Stock up with a sclerometer (Schmidt's hammer is suitable), during preparation it is necessary to check the compressive strength of the base. Strength from 20MPa is considered sufficient. We are also interested in tear strength - not less than 1.5 MPa. If the concrete base is fresh, we wait at least 4 weeks from the moment of pouring to the installation of the self-leveling floor. For the old foundation, cleaning of the remnants of the removed coating is mandatory. On the rough surface before pouring the floor there is no dust, no paint, no glue. Wash oil stains with solvent. Carefully cover defects in the form of chips, potholes, and crevices. It does not hurt to add resin to the mortar. With small cracks, the adhesive solution will cope. Small bumps are removed by grinding.
What's next?
Having prepared the rough surface and waiting for drying, we knead the solution, if desired, add the pigment there (the colored filler floor is a fashionable finishing trend) and place the finished mixture on the surface in small portions with a spatula. According to technology, the process of applying the solution is continuous, without pauses. Therefore, it will be logical to work not only alone, but at least together - if the finished mixture ends, do not be distracted from pouring the floor, ask your partner to prepare another container of the solution.
Having smeared the next portion of the mixture on the surface, adjust the thickness of the obtained layer with a squeegee. To get rid of trapped air, immediately swipe the surface with a needle roller. The same series of operations is repeated for each new portion of the solution until the entire floor is a thin even layer of pouring.
It is easiest to protect the freshly flooded floor from dust and uneven solidification by covering it with plastic wrap. It is possible to improve the appearance and performance of the bulk floor by covering the surface with polyurethane varnish, but this is only optional.
The flooring has come to its logical conclusion; after drying, the surface is ready for use.
Conclusion
Those who have an idea of how floor screeding will not see much new in the process of arranging a bulk floor. Techniques and tricks that provide a smooth and reliable surface are already familiar to experienced craftsmen. But if this is the first floor fill in your life, be doubly careful and follow the instructions verbatim when preparing and applying the mortar for pouring.
Flooring: Video