How to putty drywall for painting and all about it

Puttying drywall for painting is one of the important points. After all, if this is not done correctly, then all errors on the plane will be visible.
First, we decide how to putty drywall for painting, after which how to putty drywall for painting. Here you can do it yourself, then the price of work will not be high.
After all, you know, finishing is not cheap. Today, instructions will be given to carry out this work. And in the video in this article you can see for yourself.
The content of the article
Completing of the work
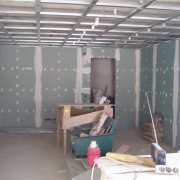
If necessary plasterboard plaster for painting, this question is solved quite simply, we pull the line along the diagonal of the room and with the help of the level we look at how much we have a deviation. If it is more than two cm, then you need to not just putty, with plaster first. The surface must be leveled.
Attention: For leveling, putty is applied for gypsum plasterboard for painting starting. It has a larger fraction and is designed specifically for this work. If you apply a cement composition, then it will be much cheaper.
If you have a layer up to one cm, then you can immediately putty finish. The first step when filling gypsum plasterboard sheets is to check all the screws on which these sheets are attached to the profile structure.
Attention: It should be remembered that they must be screwed into the thickness of such a sheet no more than 5 mm. It is impossible to allow the head of the self-tapping screw to be sunk deeper, but if this happens you just need to unscrew it and screw in a new self-tapping screw a few inches from the old hole.
To simplify your work, you can use a drill - screwdriver:
- The next step will be the expansion of joints in places where so-called “non-native” seams are formed, although there is a need for jointing and standard seams. To accomplish this task, it is necessary to use a sharp paint knife, due to which about five millimeters from the edge are cut off at an angle of forty-five degrees.

- This procedure should be done with each sheet, this will improve the adhesion of the putty and drywall and increase the area of contact with each other.
- Seams and the entire surface of the material used must be properly primed. After this procedure, putty (seePutty or putty - how to speak and write correctly) lays on the sheets much better.
Attention: It should be remembered that it is only necessary to use a primer that is designed specifically for working with GCR. The application of the soil must be done carefully and evenly, without leaving any untreated areas.
- After twelve hours, the composition dries up, which gives a green light to the grouting. For this type of work, it is recommended to use gypsum plaster. Do not save on this material, so that in the future you will not be disappointed with cracks formed on the walls due to poor-quality composition.
- This plaster can be presented in dry form, which will need to be mixed with water. This task is easily performed using a construction mixer.
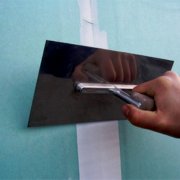
- In places of joints or seams, the use of a not very wide metal spatula is recommended. Putty is applied in the most careful way, filling all the seams completely, without protruding to the surface.
Attention: Do not forget that the seam should be glued immediately with a serpentine.On top of it, another thin layer of building mixture is applied. In this procedure, it is recommended that the putty knife be held so that the sickle can be slightly pressed into the seam.
- If the seam is correct, then it is very simple to check: for this, a large wide spatula is applied and in the absence of a gap between the tool and the surface, you can be sure of the correct sealing of joints.
- With the same spatula, you can easily seal heads from self-tapping screws or holes that can remain from them. After completing these works, putty is left to dry for about a day. Next, you should proceed to thorough grinding, after which the surface is primed again.
How to putty properly
The first step of puttying is the coating of all joints and self-tapping screws, as was written earlier.

Attention: It is important, before starting work, to check whether the screws are deepened inside the drywall. To do this, just sweep your hand across the surface of the material used and make sure that they do not protrude to the surface. Otherwise, they will have to be slightly tightened.
So:
- The seam of drywall, which was cut by hand, is necessarily cut with a knife at an angle. This is necessary so that the solution can penetrate well inside.
- For a denser application of the mixture, it is best to use the standard Knauf sheet edge (PLUK), which in the future will help to avoid unwanted cracks.
- An indispensable helper in the masking of seams is a sickle. Such a self-adhesive special mesh can easily keep the putty mixture on the seams and protect them from cracks. A special perforated tape, which is based on non-woven, is glued in places where drywall is attached to the plaster.

- Putty mixture is bred strictly according to the instructions indicated on the package with a drill, on which a special nozzle is attached.
Attention: The main task when puttying is to fill the seam as much as possible, hide the mesh, while applying a minimal layer of building mixture.
- As for the corners, they are puttyed alternately, that is, in one direction, then in the opposite. With the help of cruciform movements, the caps from the screws are smeared. After the putty has completely dried, it is necessary to walk along the seams again. Using perforated corner, you can easily mask a relief joint or corner.
- Putty consumption will be approximately as follows: 1 kilogram of building mixture will have to be spent per square meter of material.
- To putty corners on drywall using a corner, you must first measure the length and cut off the corner. Glue for the corner will be the applied layer of putty on any of the joined surfaces.
After this, the cut-off corner should be applied closely, while pressing on the side of the corner, for example, with a long level or bar. - The next stage - the perforated joint is puttied. In order to properly and efficiently putty the ceiling at the corner junction from a material such as drywall, a starting mixture is required, which is subsequently laid at the junction using a spatula.
Attention: It is very important to create an even plane without sudden changes and bumps. Putty is applied in two or three layers and you should not forget that they must be thin. A huge mistake will be an attempt to apply one large layer at once. In the future, it will crack, all the work done will be in vain.
- After drying of all the material used, grind the surface with a grout.
- The final stage can be called finishing putty. In this case, various polymer mixtures for puttying are used.
This high-tech material is unique in that it is able to create a very thin coating literally up to one millimeter.Thanks to this layer, the surface will become smooth and completely ready for further use - decorative finishes. - In the case when the wall is prepared for painting, the putty is done more carefully, since even the smallest joint, the curved corner can end up being too noticeable and spoil the whole picture.
Surface grinding
Drywall putty for painting is polished after complete drying. After all, in any case, you will remain divorced.

So:
- We take a construction grid for grinding and put it on a flat bar. Or you can buy a special grater where the mesh is attached.
- We smear with the abrasive movements to process the entire plane.
- After completion, sinks remain on our surface. They must be treated with putty.
- We make a mixture for putty, but a more liquid composition.
- Now we’ll mash the shells with her. To do this, use a spatula.
- After drying, again with three nets and grind the ceiling. And so it is done to a completely flat surface.
Advice
Do you need to putty drywall for painting, you now understand. The plane should turn out perfectly flat for us and therefore the processing will have to be done unequivocally.
But on the topic of how to properly putty drywall for painting, there are a few tips:
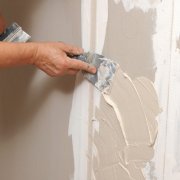
- It is best to apply putty on the used surface with two spatulas, one of which should be narrow and the second wider. A smaller spatula is convenient to put putty on a large spatula and, if necessary, remove excess from it.
- If you prefer roll coating, it is important to properly putty on drywall.
Attention: Actually a very important point is the quality of the selected wallpaper. Heavy textile wallpaper on the ceiling requires a rough surface. This will provide better bonding.
- Thus, it is better to use a coarse-grained mixture and the finishing putty is not used. The surface is covered with coarse putty and grouted only in clearly defective places.
- If it is decided to paint the surface, it is recommended to use special water-based formulations for painting gypsum sheets. When decorating the walls of a bathroom or kitchen, it is best to give your preference to an aqueous emulsion solution, which is not afraid of moisture.
This type of paint is usually presented in white, which subsequently can be given any shade using special mixtures. - Without a doubt, the best and most convenient tool for painting walls is a spray gun, when used, the paint lays on the surface perfectly evenly and the quality of the work done will be on the face.
But the use of this tool requires certain skills in the work. The backup option is the most common roller. It can be both fur with a short pile, and with a velor coat. - It is advisable to paint the walls or ceiling with the heating turned off, so you should worry about this in advance. This is necessary for complete and uniform drying of the paint on the surface and will protect against cracking of the material used.
- An important factor in carrying out such work is the exclusion of drafts.
If you follow these simple rules when preparing walls for painting, you can be sure of an excellent final result, which will delight the owners for more than one year. Putty of drywall for painting is a rather sensitive issue. Here you will need to spend time. But in return you get a perfectly flat surface.