Ceramic flooring - the right veneer

Cladding with ceramic tiles is the most popular in bathrooms. This is a wonderful material that tolerates temperature extremes and high humidity.
Facing walls and floors with ceramic tiles is perfect for decorating the bathroom, because this coating will protect the walls from moisture and this will significantly extend their service life. Today we will tell you how to tiling with ceramic floor tiles.
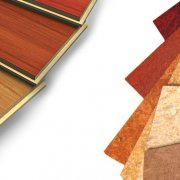
After all, the floor is first made and only after this wall. Ceramics for flooring are available for sale and you can easily pick it up. There are many colors and sizes.
The content of the article
Ceramic tile and its advantages
Facing with ceramic tile floors has a number of advantages that are worth exploring before buying:
- Belongs to hygienic building materials - the tile is easy to wash;
- The tile does not burn; it also tolerates elevated temperature;
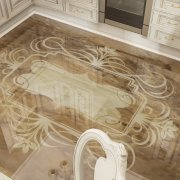
- Aesthetically attractive, its surface is able to repel water;
- Tiles are characterized by increased strength and hardness and will last for a long time;
- The price of the material is not so high and you can do all the work yourself, this factor adds to the number of people who want to do the work themselves.
Attention: Before buying a tile, it is necessary to choose a place where it will be placed. Its qualitative and functional use depends on it. It is also right to choose the size of the tile, the amount of waste will depend on this.
We select a tile
Device floor cladding ceramic tiles begin with the right selection of material.
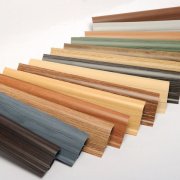
After all, this material is of several types:
- For example, you need to put tiles in the bathroom or kitchen, then you should choose this material for interior work.
- For facing the facade of the building, they select the facade tile. It is able to withstand changes in external temperatures and high humidity, which it will not miss.
- To finish the floor, use the appropriate tile, which is not washable and has a high density.
You should also decide on its heterogeneity of the front:
- Dense and porous base;
- Glazed and unglazed coating;
- Extruded and extruded composition.
Ceramic tiles can be with a smooth and grooved base. Tiles can be natural, artificial, with patterns, of the same color or multi-colored.
We prepare materials and tools
For continuous operation, it is necessary to prepare materials and tools. We will not have just time after the start of work.
You will need:
- Presence of drying oil and rosin, gypsum, glue and turpentine;
- It is necessary to prepare synthetic mastic and wire mesh made of metal to hold the soil;
- For facing a wooden surface, you will need a roofing material or roofing;
- Ceramic tile.
- A dry mixture is required for a flat surface. If you have a plane deviation of more than one cm, then you will need to make a surface plaster, and for this you need to prepare sand and cement.
Availability of tools:
- Cord to do markup;
- Shovel for plastering and ruler;
- Spatula with glass cutter, nail brush and chisel;
- You will also need a tile cutter;
- Plumb and level.
Cladding technology
Floor Cladding Technology ceramic tiles not so complicated, it is simply important to make the correct marking and high-quality surface preparation. Before starting work, you should look at the photos and videos to fully understand what and how we need to do.
Sequencing:
- We take measurements.
- We are marking up.
- We prepare the adhesive composition.
- We lay the tile.
- Overwrite the seams.
Now let's take a closer look at these stages of work.
We prepare the surface and knead the solution
The technology of flooring with ceramic tiles begins with the proper preparation of the base plane. After all, if this is not done, then the facing will not last long.

So:
- We begin preparation with a thorough cleaning of the plane. Remove completely the old coating. If there are cracks on the surface, then they should simply be gouged with a chisel;
- Now we need to measure the plane using the building level. If the surface is not in the axis, then you need to make a floor screed. The plane must be flat. The tile will completely repeat it
Attention: If the surface deviations are within one cm. Then you have to lay the tile on the cement mortar. Such a difference can then be deduced simply by correctly laying the tiles.
- If the surface is within the normal range, then you just need to prime it. This will increase the adhesion of surfaces and enhance the adhesion of surfaces;
- For the primer, you can also apply the mixture on which you will mount. It is made more liquid and applied as a primer.
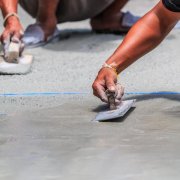
Tile flooring
Before self-laying the tiles on the floor, they initially wipe them with a damp cloth, especially when using cement-based glue or with organic water-based mastic.
Attention: Tile flooring starts from the extreme corner of the room. At the end of the work, the master-stacker should approach the exit and not disturb the finished work.
The technological process for laying ceramic floor tiles is similar to the method wall cladding. The only difference is that the material is laid on the wall from bottom to top, and when laying tiles on the floor - from the extreme corner of the room.
So:
- The adhesive composition is applied with a comb or trowel with teeth. From the very beginning, quite a bit of glue is put on the inside of the ceramic tile with the flat side of the comb, an angle of inclination of 30 degrees is necessary to apply a little pressure. A suitable layer is 2.5-3 mm.
- Next, the adhesive composition must be ironed with the toothed side of the comb at an angle of 45-75 degrees. The furrows in height should be the same, so the coating will look neat.
- We apply the tile to the surface and press. In our solution there should not be any air blows. It is unacceptable. Sometimes you can shrink with a rubber mallet.

Attention: Before you start laying ceramic tiles, you should read the recommendations and tips of the manufacturer. Such information is usually indicated on the packaging itself with glue.
- We lay the tiles from the extreme corner of the room to the exit. To conveniently perform the work, it is necessary to use a tightened thread and level.

- Also, you must first calculate the number of integer elements that will fall in a row. We need to create the right placement;
- We cover the entire plane of the tile with adhesive. We make sure that the glue is laid evenly. The tile should be equal to the level of the stretched thread, for this the tile needs to be tapped with a wooden hammer or a trowel handle.
- The same process must be repeated with subsequent tiles, between which you need to install crosses. The inter-tile seam should be 2-4 mm thick.
- At the end of the work, the tile should be cleaned of the solution and grout the seams with grout. Just do it right away.It is necessary to let the surfaces dry a little and wipe the seams after that. Otherwise, the solution will simply spread over the surface.
Professional Tips
Experts give some recommendations that are worth considering:
- If you can’t put in a row a whole number of tiles, then at the corners the excess is cut with a grinder or tile cutter. The pieces that remain can be put in the corners, then they are closed with a rack, a cabin or a cupboard.
- The process of facing with tiles must be carefully planned, since the cost of ceramic tiles is an expensive pleasure. When buying tiles, you should add 10% of the tiles of the total amount that will be needed for trimming.
- Ceramic textured tiles, which provides for fitting and joining, should be calculated when buying 15-20% more of the total.
- If you have to make holes, then this is best done with a crown or ballerina. Just do not make a sharp pressure. Then the icing will chip and you will not get a quality edge.
There is an instruction and you can get to work. The main thing here is not to rush and make the correct markup, because the price of the issue is a quality appearance.

There is such an idea, to finish the entrance hall with tiles, I understand that it is customary to finish the kitchen and bathrooms with tiles, but I think that in the hallway it will also be in place.